#
How To Use
Metaburner is currently in a public beta testing phase.
We are actively developing it based on user feedback.
You can download and install a watermarked version for free on FxFactory.
Download Now!
We hope to finish public beta testing by the end of January 2024.
Got ideas or questions? Post them on our Discussions page!
#
Installing
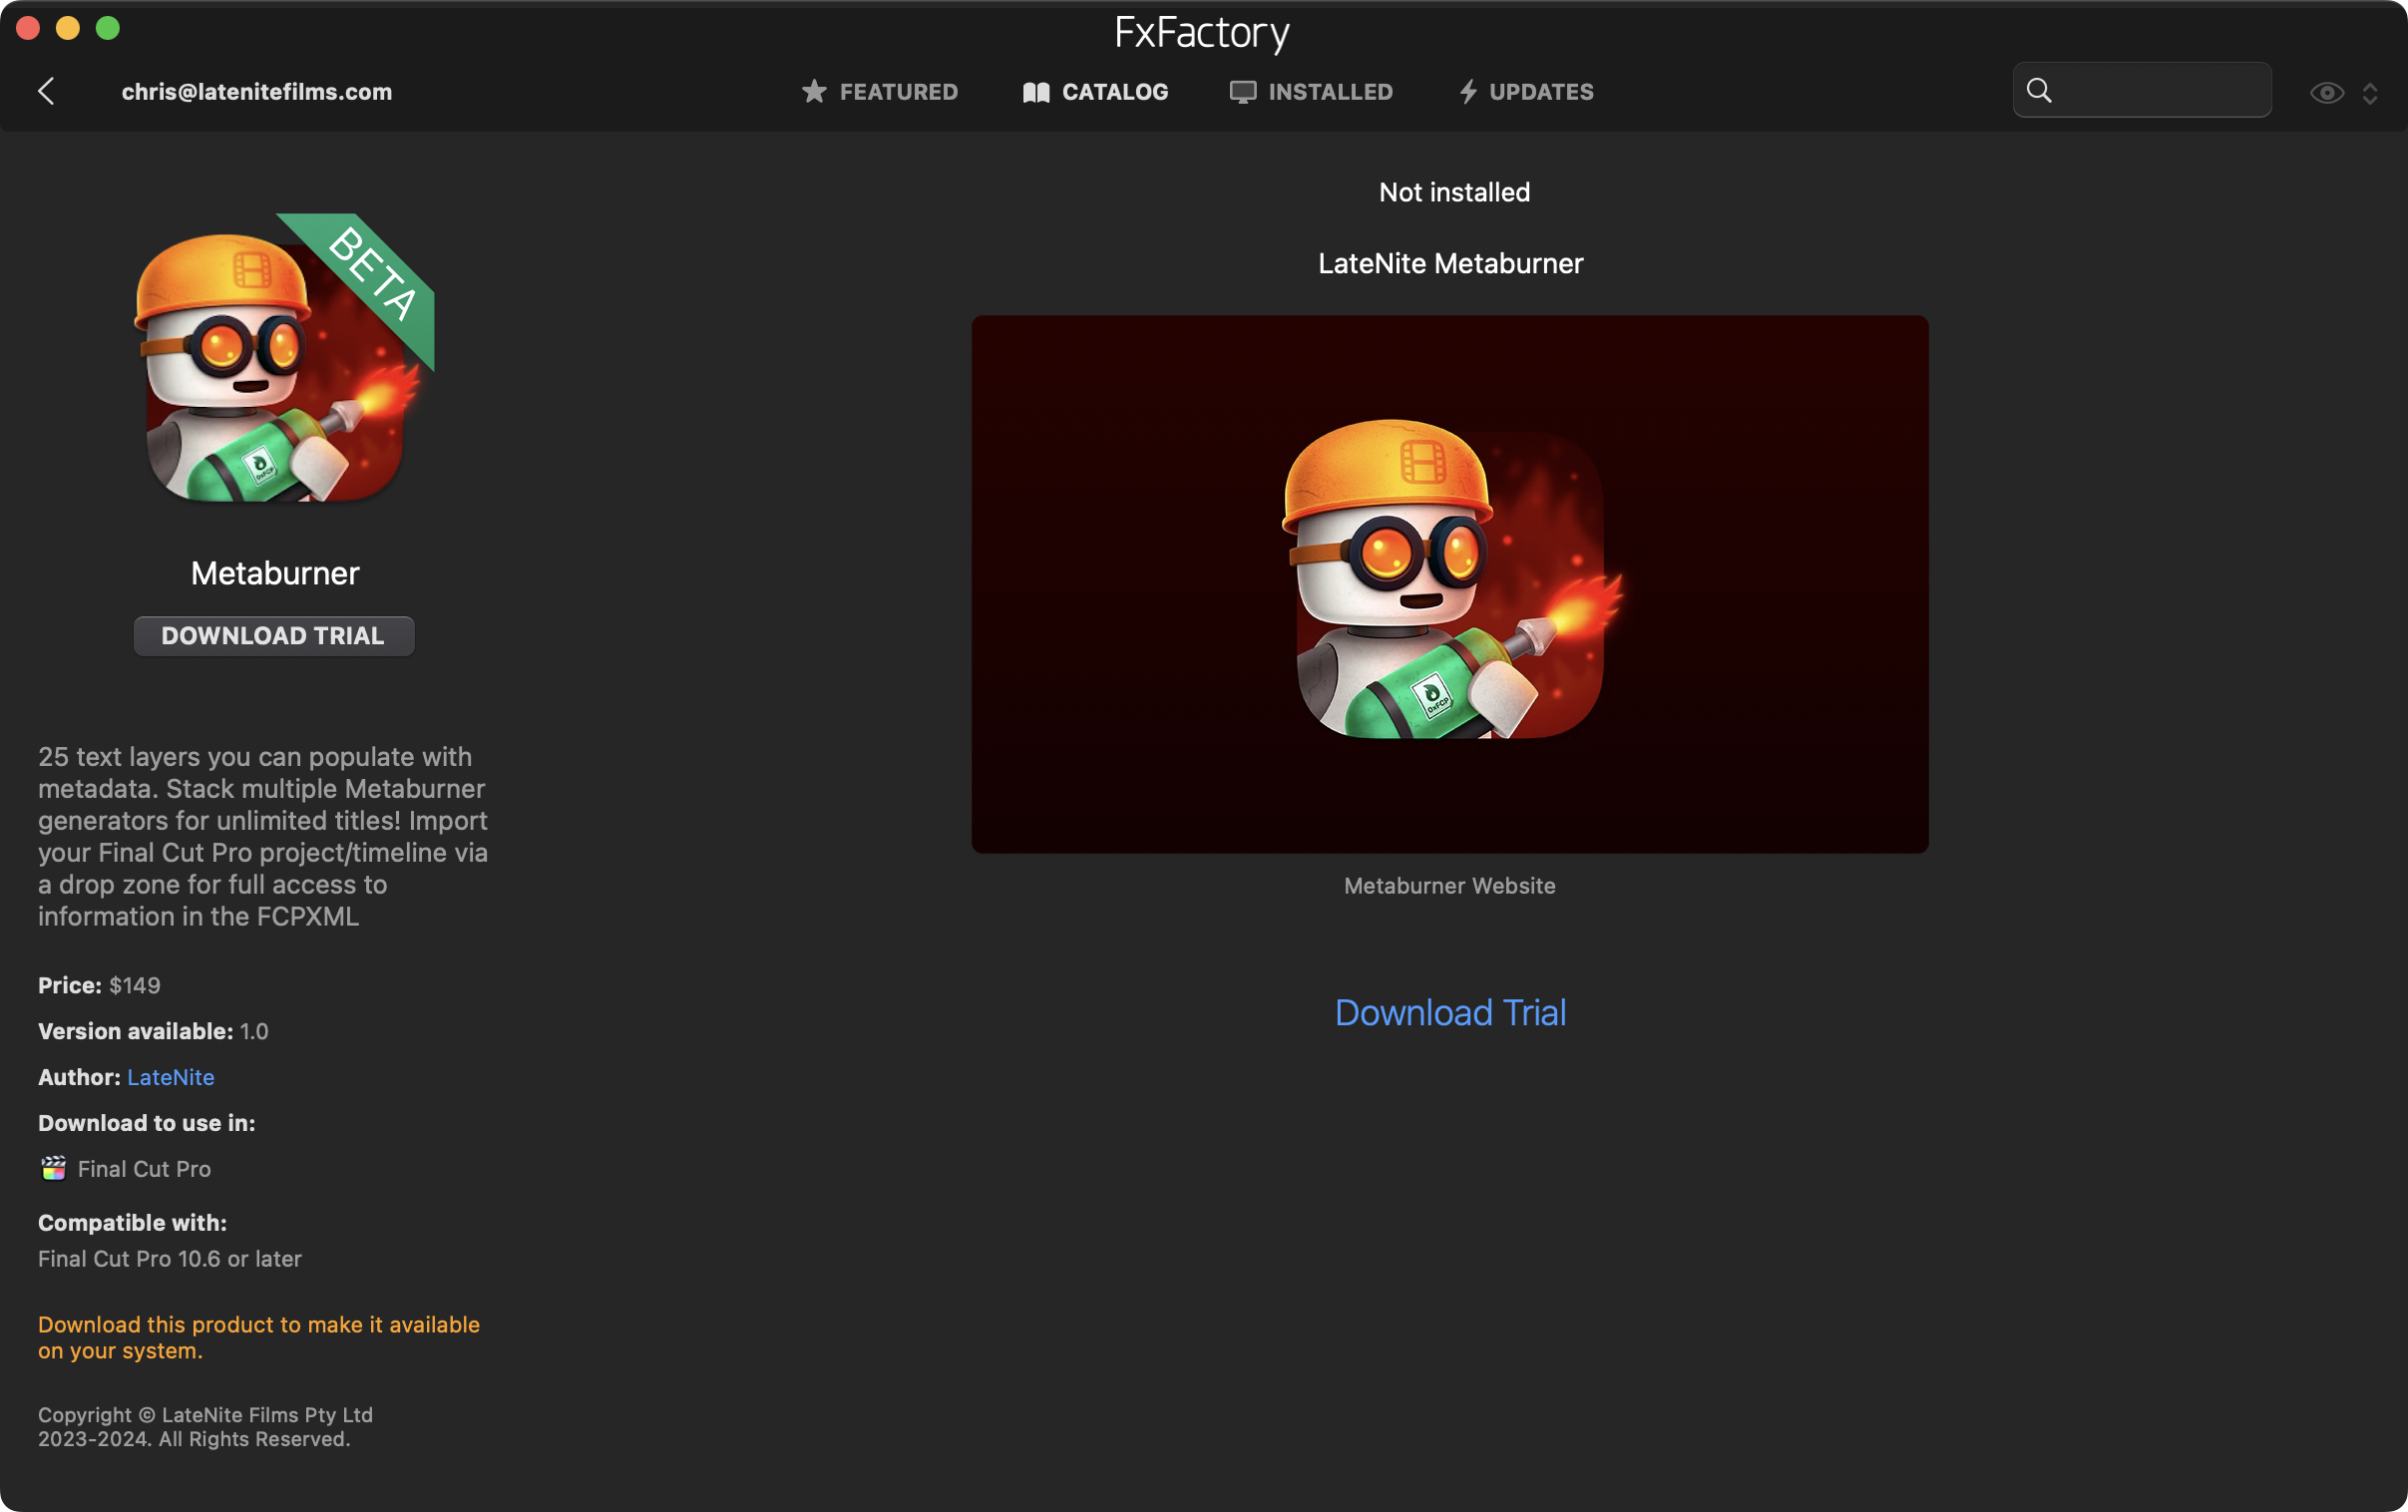
You can download Metaburner via FxFactory here.
Alternatively, simply search for Metaburner in FxFactory and click DOWNLOAD TRIAL.
#
Known Issues & Bugs
Please check the Issues page for any known bugs or issues.
You can find the full release notes here.
#
Accessing in Final Cut Pro
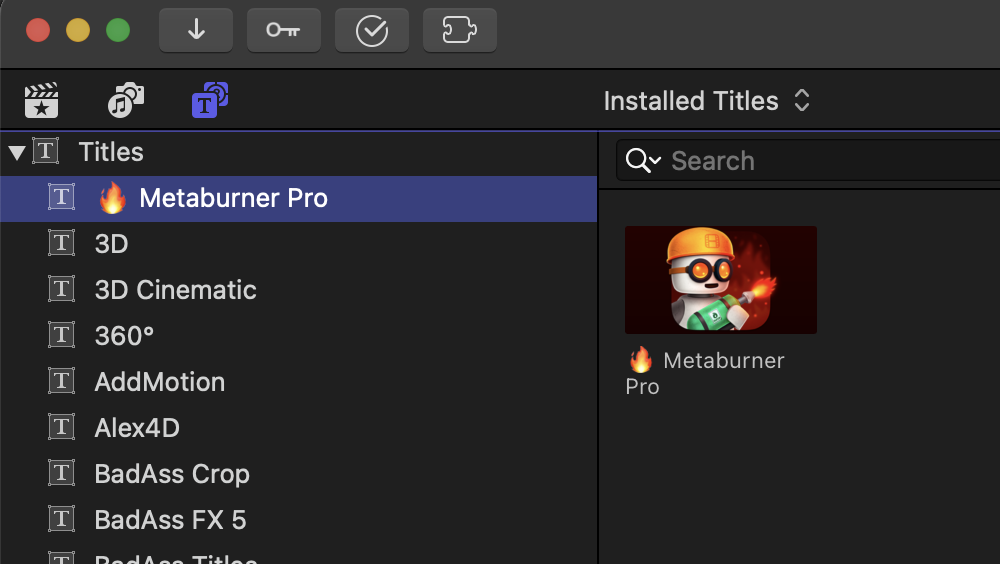
After installing the Motion Template, you can find the Metaburner Title at the top of the Title sidebar in Final Cut Pro:
#
Title Inspector
Simply add the Metaburner Title to the top of your timeline as an adjustment layer.
It should start at the very start of your timeline.

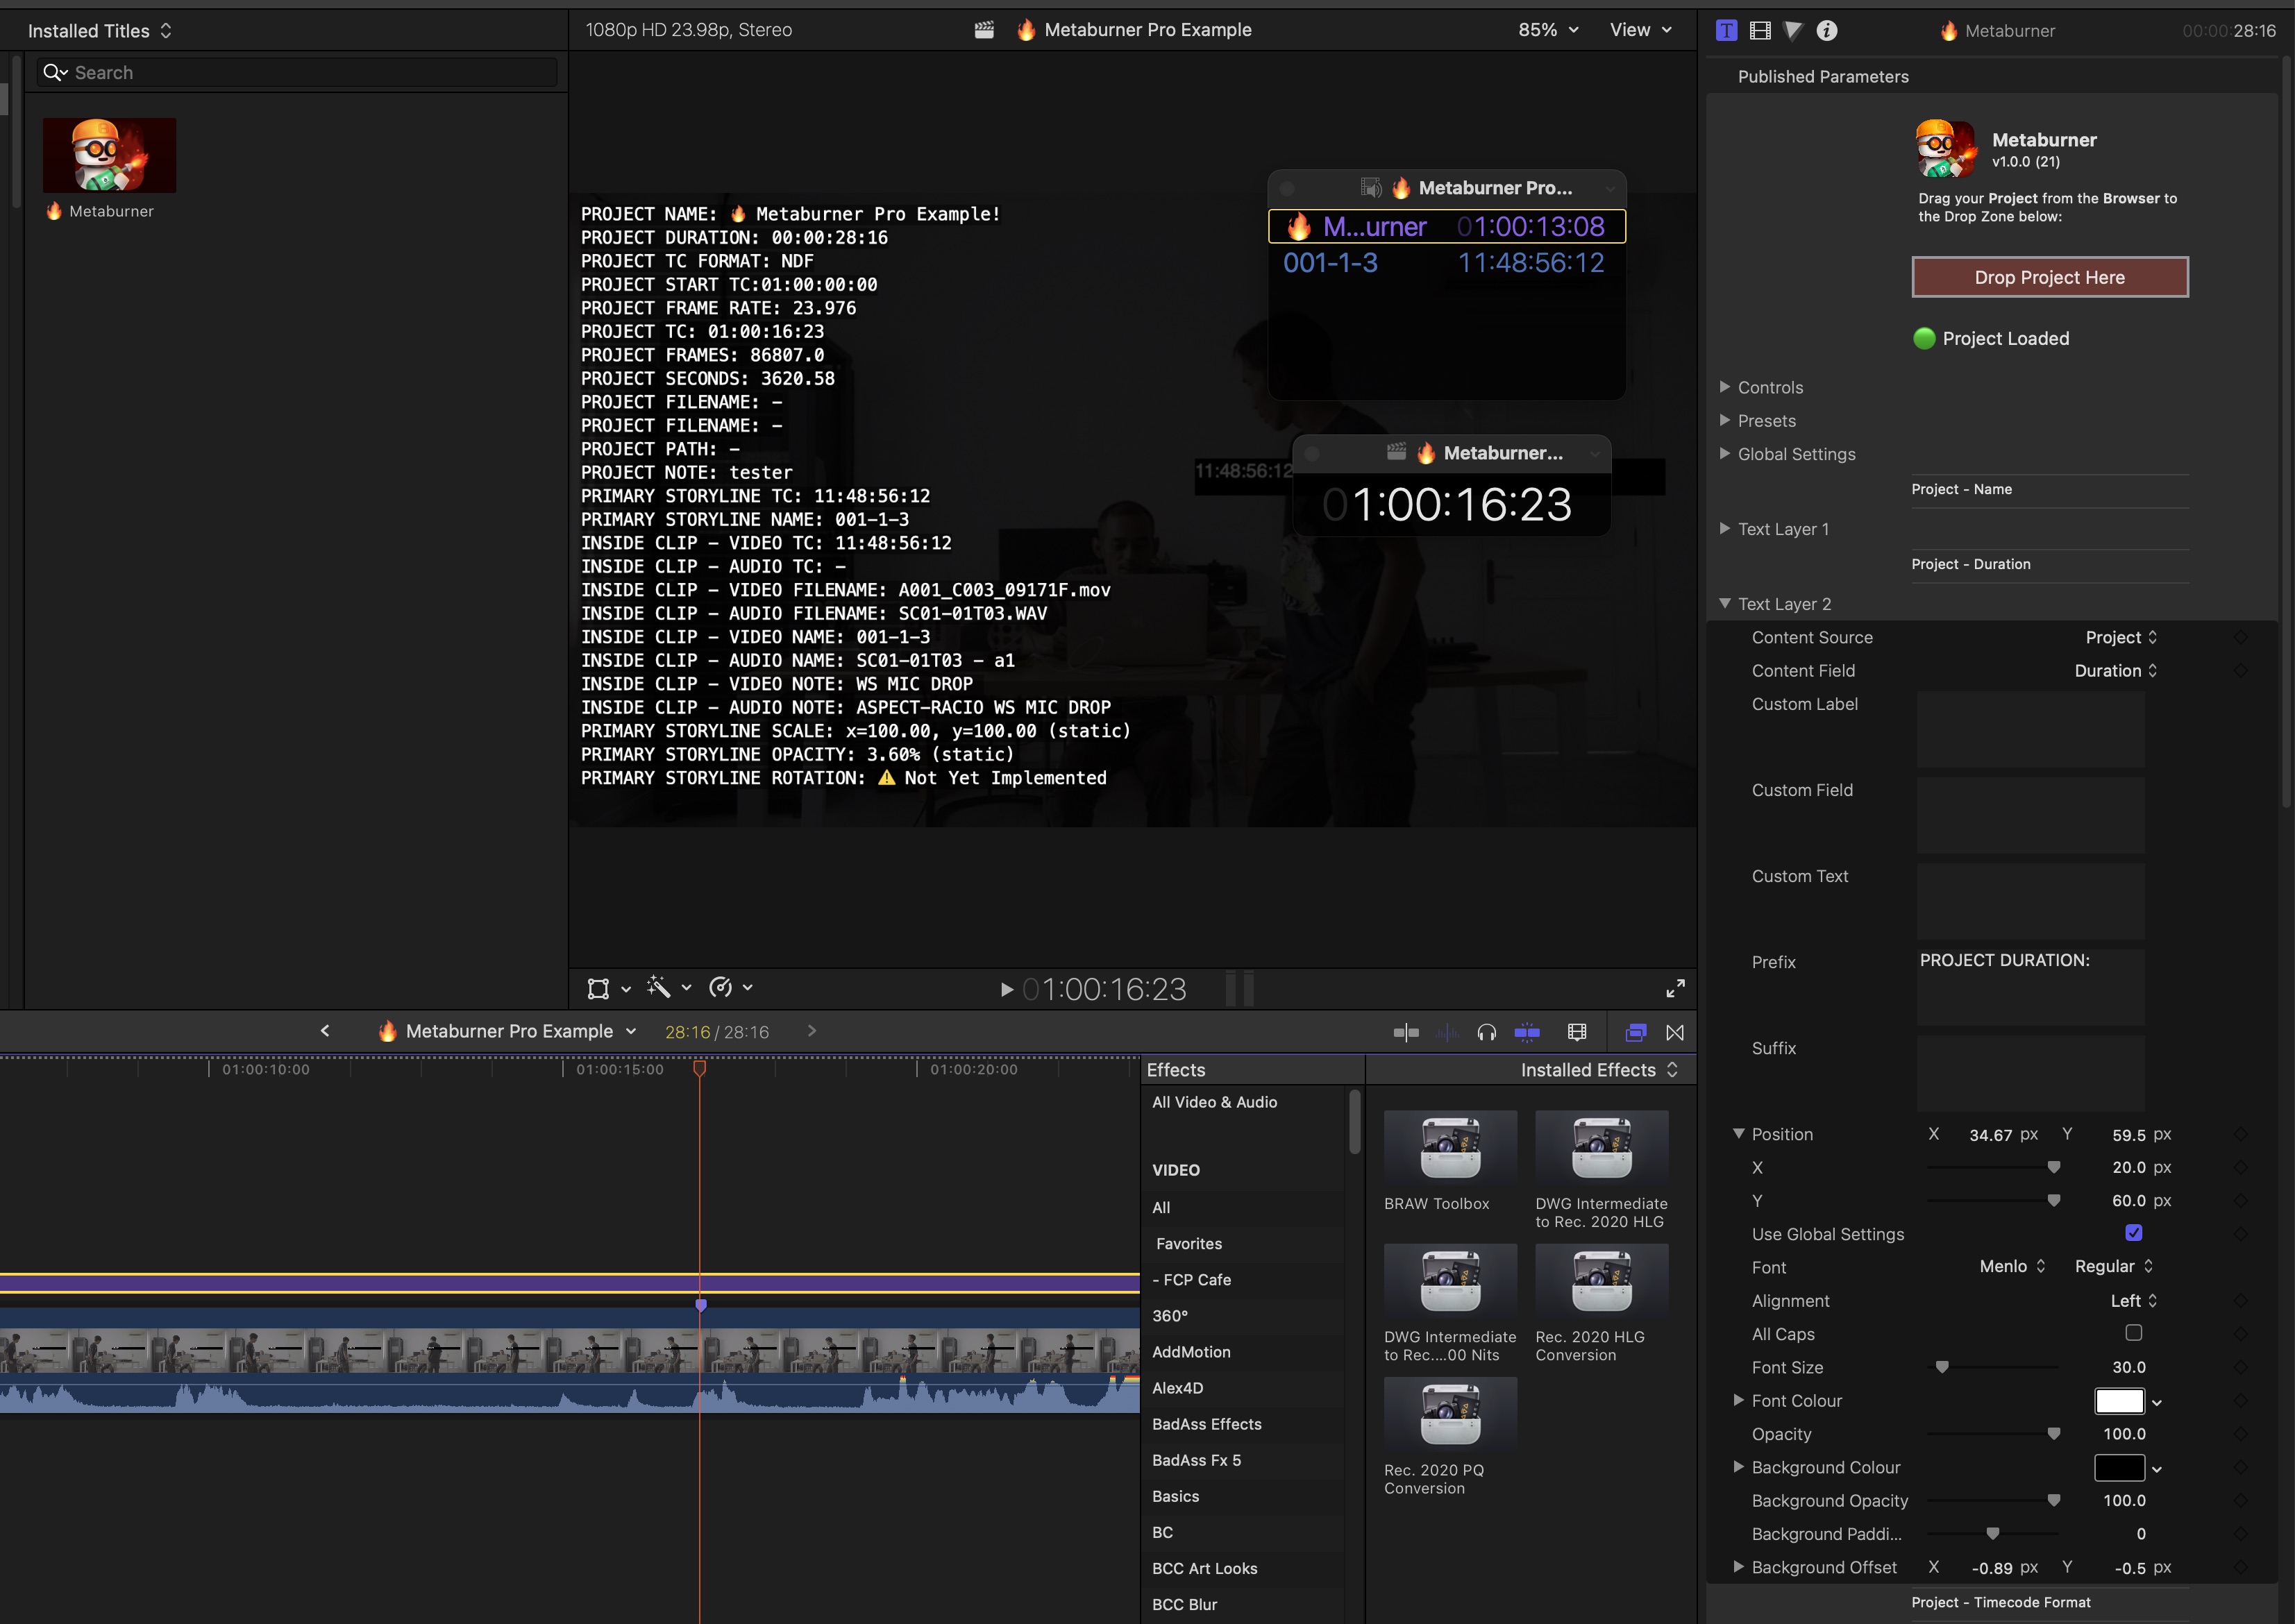
You can then control it via the Inspector:

There are 25 customisable text layers, which you can customise however you want.
There are Global Settings which apply to all Text Layers:

You can override these Global Settings on an individual text layer by deselecting the Use Global Settings checkbox:

The Content Source dropdown is where you select where you want to get your metadata from.
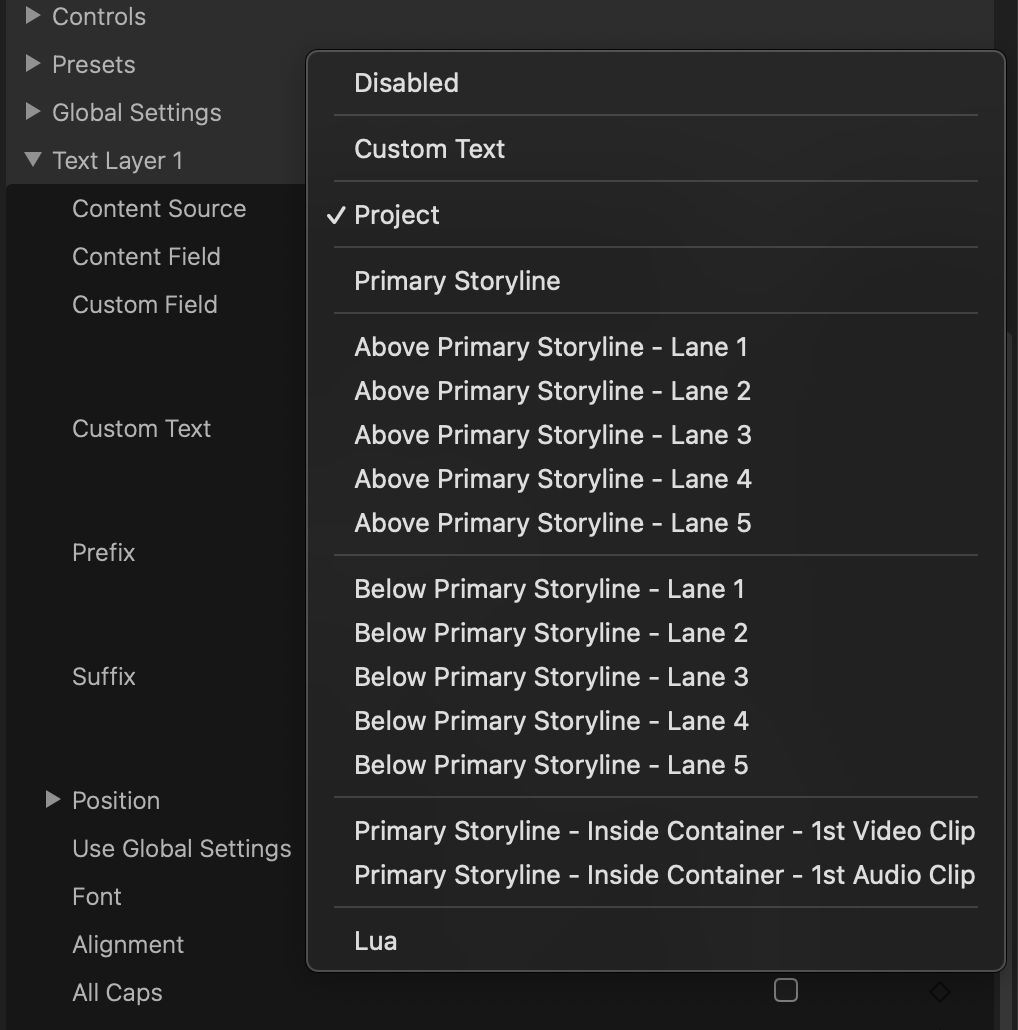
If you select Custom Text it will use the Custom Text textbox in the Inspector.
If you select Project, it will get the metadata from the project/timeline.
If you select Primary Storyline, it will get the metadata from the primary storyline, etc.
If you've selected something other than Custom Text you must then select a Content Field.

For example, if you have Project selected in the Content Source, and Name selected in the Content Field, then it will display the name of your Project (after you drop a Final Cut Pro Project into the drop zone).
You can add a Prefix and a Suffix to all text fields, regardless of the Content Source and Content Field.
When you first add the Metaburner Title, it will display this image in your Viewer:
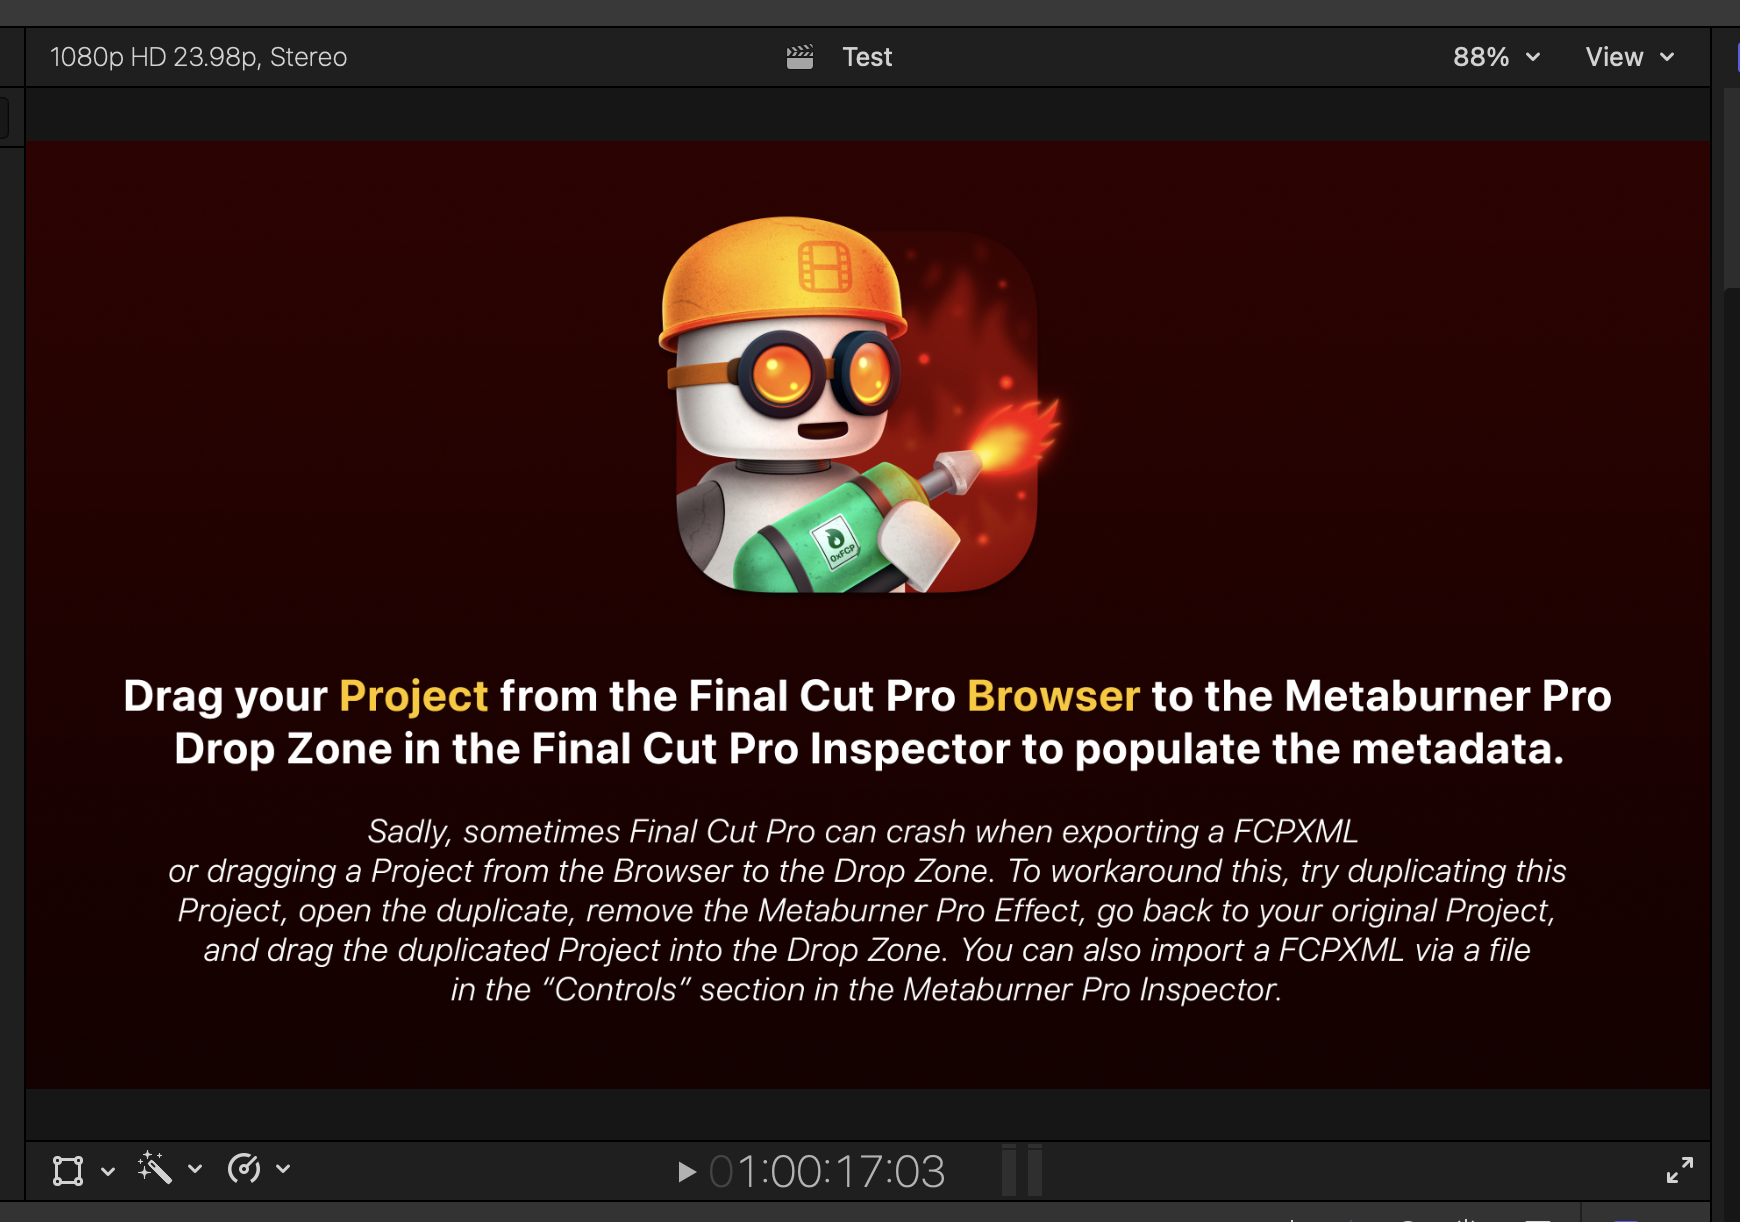
As the image explains, so that Metaburner can access all the metadata in your project/timeline, you need to drag your project/timeline from the Browser to the drop zone at the top of the Inspector:

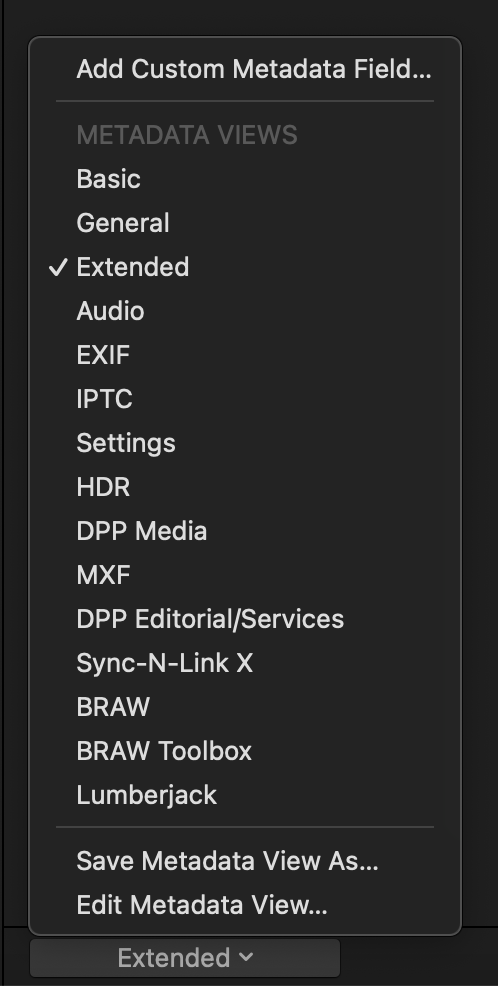
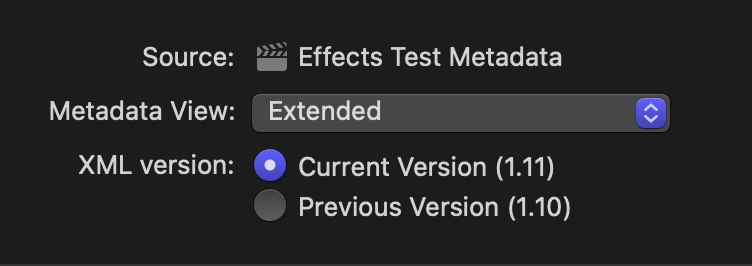
What metadata Final Cut Pro provides when dragging a project/timeline, depends on what Metadata View you currently have selected in the Info Inspector:
Final Cut Pro can be a bit temperamental when dragging things from the Browser to the Inspector over the Viewer, so you might have to drag it slowly/carefully for it to work. Sometimes the Inspector will change views, which breaks the workflow, so simply try again.
We have also noticed that sometimes Final Cut Pro can crash when exporting FCPXMLs, as documented here. We hope that Apple will address this in a future Final Cut Pro update.
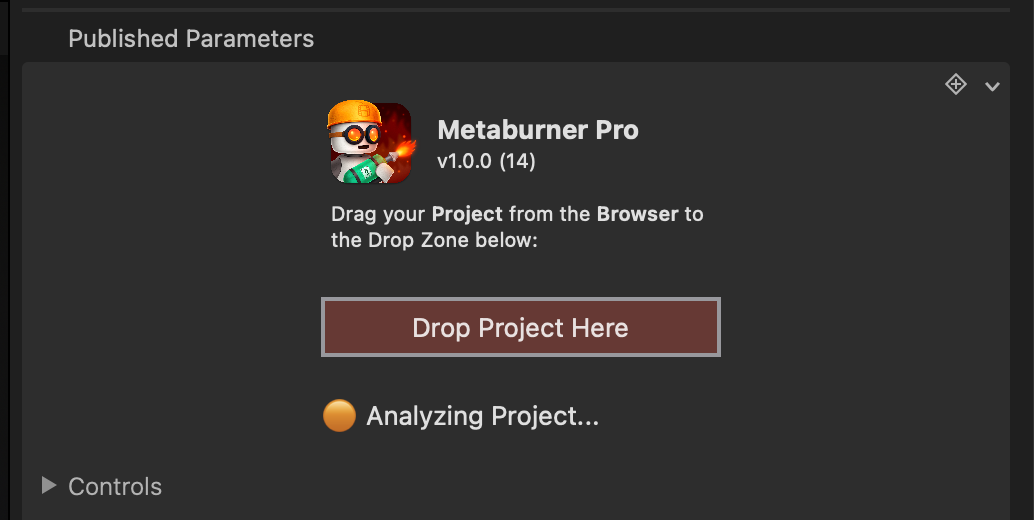
After dropping a FCPXML, the status text will change to Analysing Project:
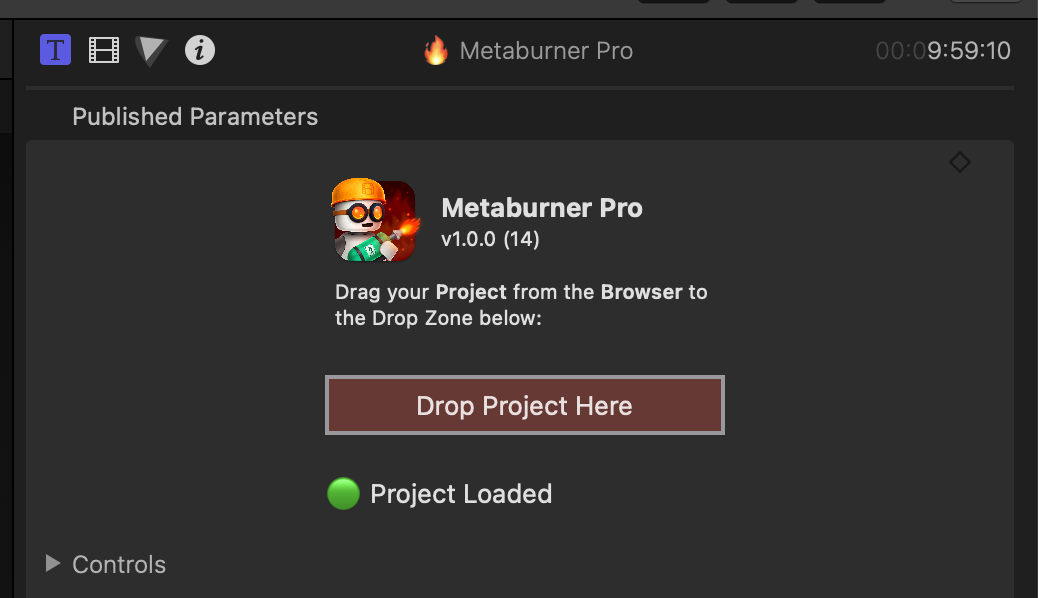
After a short time, if successful, the status should change to Project Loaded:
Final Cut Pro can be a bit temperamental in terms of updating the status, so you may need to click away from the Metaburner Title and then go back to it for the text to update.
Once done, Metaburner has access to all the metadata within the FCPXML to populate all the Content Sources.
If you make changes to the project/timeline, you'll need to drag the project back again to update the contents of Metaburner.
If Metaburner was unable to import the FCPXML, you'll get an error status, which you can hover over with your mouse to get more detail:

If you do run into an error, it's most likely a bug in Metaburner, so please share your Error Log and FCPXML on GitHub here.
#
Custom Metadata Field
When you have the Custom Metadata Field selected, you also need to supply a Custom Field with the key for that metadata field.
For example, if you have the Extended Metadata View selected in the Info Inspector:
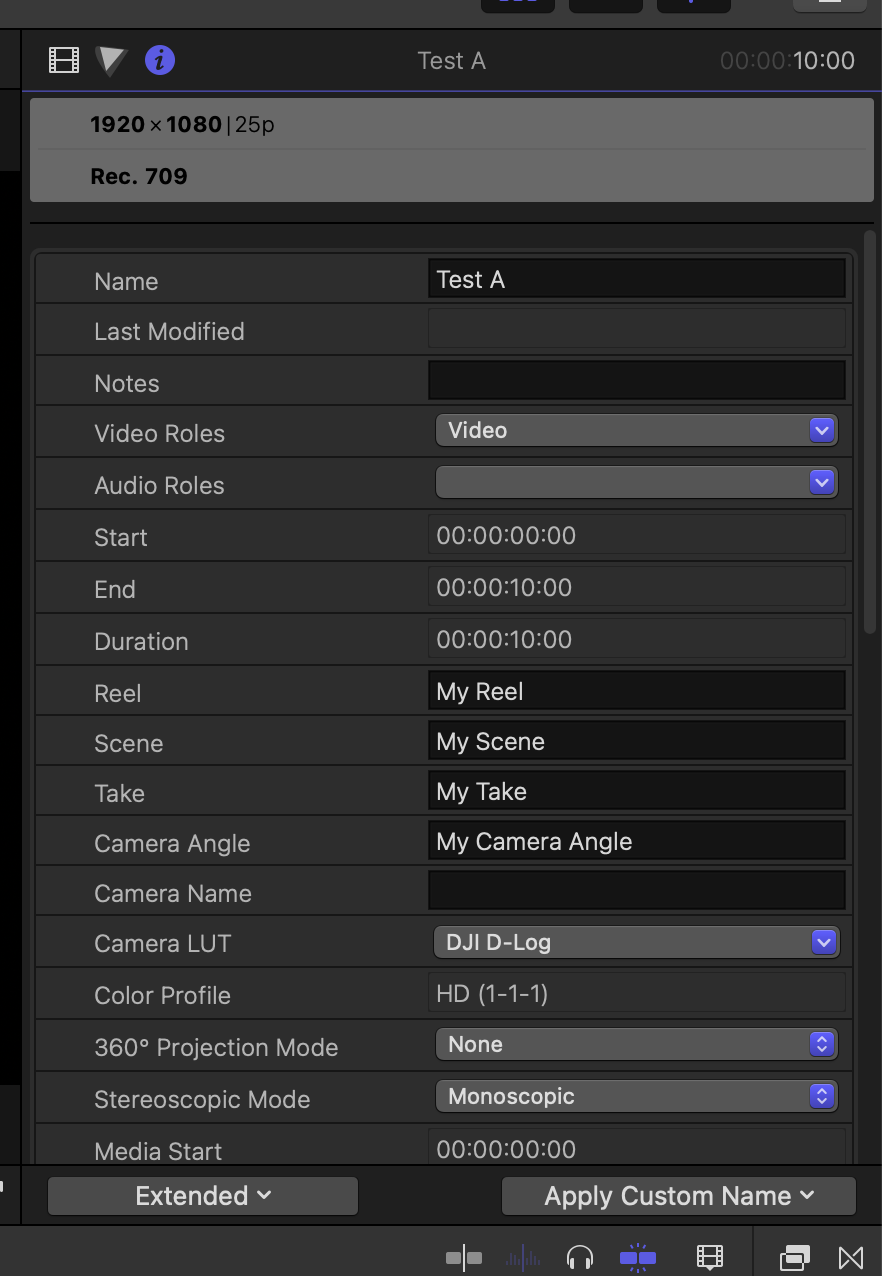
If you then export a FCPXML with the Extended Metadata View:
...and you open that file up in TextEdit, you'll see something like this within the FCPXML:
<metadata>
    <md key="com.apple.proapps.studio.reel" value="My Reel"/>
    <md key="com.apple.proapps.studio.scene" value="My Scene"/>
    <md key="com.apple.proapps.studio.shot" value="My Take"/>
    <md key="com.apple.proapps.studio.angle" value="My Camera Angle"/>
</metadata>
You can then use com.apple.proapps.studio.reel in the Custom Field within the Metaburner Inspector to display the Reel.
Keep in mind that Metaburner only has access to whatever metadata you have visible in the Info Inspector, so make sure you select the correct Metadata View before dragging your project to Metaburner's Drop Zone.
#
Lua Scripting
You can learn more here.
#
Error Logs
You can press the Reveal Log Files button in the Controls section of the Inspector to access the, for example, Metaburner Renderer - 1.0.0 (22).log file in Finder:
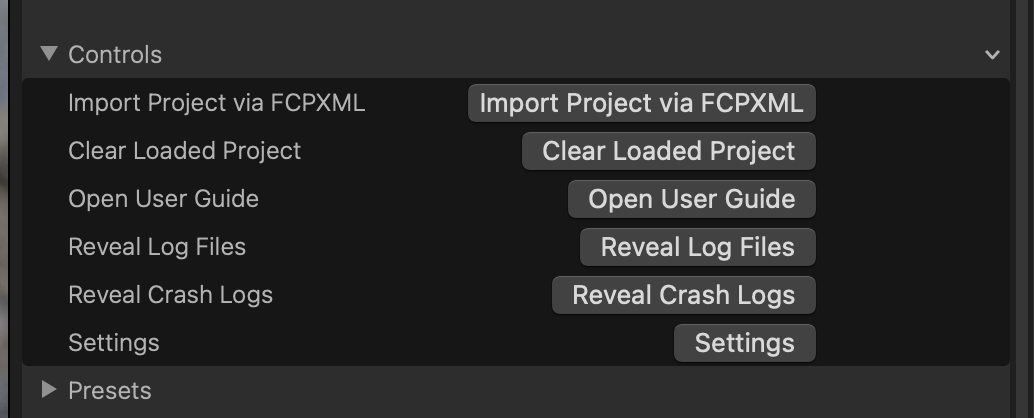
The log file is located in this folder with the name of the current version and build:
/Users/YOUR-USER-NAME/Library/Application Support/Metaburner/Logs/Metaburner Renderer - 1.0.0 (27).logYou can press the Reveal Crash Logs button in the Controls section of the Inspector to access the DiagnosticReports folder in Finder.
The crash logs are located here:
~/Library/Logs/DiagnosticReportsThe crash logs will have file names like Metaburner Renderer-2023-12-24-103301.ips. They might also be in the Retired sub-folder (these are reports that have already been posted to Apple).
Alternatively, you can access your User Library, by clicking on your Desktop, then holding down OPTION as you click the Go menu item in Finder. A Library option will appear:

You can also copy the above paths, press COMMAND+SHIFT+G from Finder (or via the Go > Go to Folder... menubar item), and paste in that path into the Go to Folder popup.